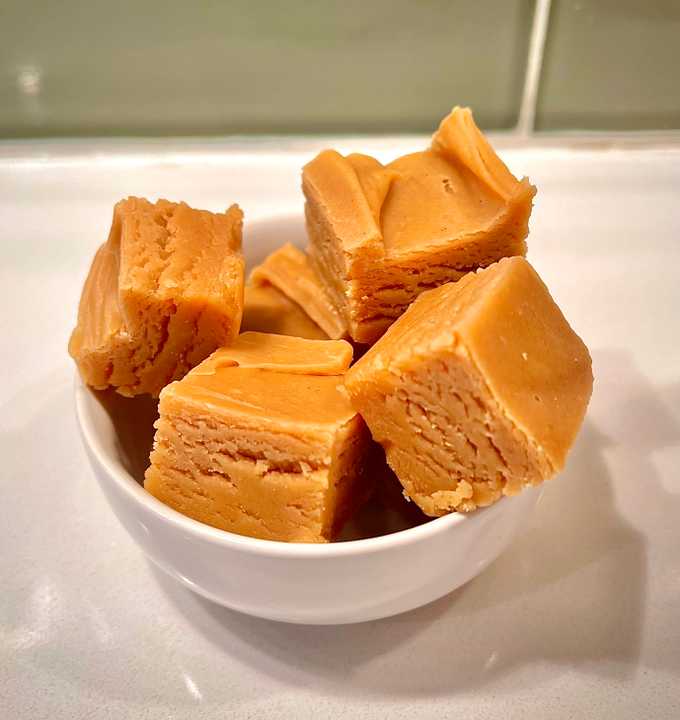
Real Peanut Butter Fudge
No need to refrigerate, no texture-wrecking shortcuts like sweetened condensed milk — which results in disappointing fudge that won’t hold its shape at room temperature — and a result that outshines anything you can do with a microwave and powdered sugar. Quality peanut butter fudge isn’t easy to make, but I promise you can handle it. I’ve adopted some of the shortcuts that don’t compromise on flavor or texture, so this recipe isn’t exactly “how your great grandma made it,” but the result is indistinguishable. At least it is indistinguishable from how my own late grandmother made it.
Do not attempt this recipe without a reliable thermometer. There simply isn’t any way to time this accurately. You have to go by temperature, or if you must you can try to do the water test to check for what stage your sugar syrup has reached.
If you have to google the water test, just buy a thermometer. Even the water test is hard to do correctly and in the time it takes for an inexperienced hand to carry it out, you’ll likely overshoot the acceptable temperature range for soft ball stage and your fudge will be too hard.
Scales and thermometers are your friends if you want consistent results. Each can cost less than the ingredients for a batch of failed fudge.
The two shortcuts we are using here are evaporated milk, and marshmallow creme. The evaporated milk just saves time. Essentially when making fudge with milk, you would need to boil off a huge amount of moisture from the milk before you could stir in the peanut butter and marshmallow. Using evaporated milk is literally just milk that has less water content. Thus the cooking process will go much quicker.
The marshmallow creme is another shortcut, but instead of compromising on flavor and texture like using sweetened condensed milk would, the marshmallow provides proteins from the egg whites and corn syrup - and invert sugar. The egg whites slow and inhibit the formation of sugar crystals as our candy sets, resulting in smaller crystals. This is also why fudge is beaten as it cools before pouring it in the pan to set. The beating agitates the fudge and interrupts the formation of large crystals, breaking up larger crystals into smaller “seed,” crystals and distributing them evenly around the candy. The smaller the sugar crystals are, the harder it is for your tongue to detect them, thus the smoother the fudge feels. Big crystals make for grainy fudge. This is also true for ice cream, and we use similar ingredients and techniques to achieve better smoother mouthfeel from frozen desserts — churning ice cream to seed the smaller ice crystals and prevent large ones from forming is essentially the same as beating fudge.
Corn syrup and other invert sugars can have the same effect, slowing the crystallization of sugar in our fudge. Because the corn syrup itself is resistant to crystallizing, when it is evenly distributed in a sugar syrup, it also limits the maximum size of the crystals by putting a microscopic obstacle between two smaller crystals that might otherwise join and form a larger crystal.
The crème also contains a bit of cream of tartar or other acid originally intended to stabilize the egg white proteins to make them whip better, but in our fudge it also has the effect of reducing crystal size.
Ingredients
- 200g (1 cup) Light Brown Sugar
- 400g (2 cups) Granulated White Sugar
- 4 tbsp Unsalted Butter
- 1/2 tsp Diamond Crystal Kosher Salt or 1/4 tsp Table Salt
- 7 oz Marshmallow Crème
- 5 oz Evaporated Milk (1 small can)
- 12 oz Commercial Peanut Butter, I use creamy JIF. Natural Peanut Butter where the oil separates will not work.
- 1/2 tbsp Vanilla Extract
Directions
- Measure out all your ingredients ahead of time, once your syrup has reached the correct temperature you need to work quickly to incorporate the marshmallow crème, peanut butter, and vanilla
- Line an 8x8 pan with foil, and spray with cooking spray.
- Add butter, sugars, salt, and milk to a heavy saucepan. Melt ingredients together over high heat, stirring constantly until they begin to boil.
- Once boiling, place your thermometer into the syrup, turn the heat down to medium, and stir constantly until the syrup reaches 234°F. If your syrup reaches 238°F add water by the tablespoon until it drops below 230°F, and wait for it to hit 234°F again.
- Once it hits 234°F remove from the heat and stir in your peanut butter, marshmallow crème, and vanilla. Continue stirring until the mixture has thickened considerably, not unlike the consistency of room temperature peanut butter. The candy will also lose its glossy shine, and take on a duller surface quality. You may also hear it begin to make a “snapping,” sound.
- Once your fudge is well beaten, thickened, and the surface has lost most of its shine tip in into your lined 8x8 pan and allow it to set for at least two hours at room temperature.
