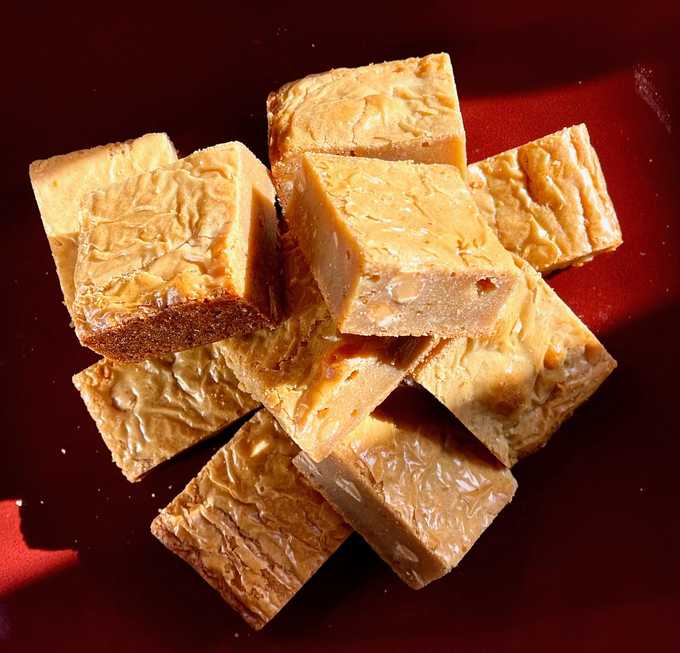
Peanut Butter Bars
This bake sits exactly halfway between Peanut Butter Fudge, and Blondies. The bars are dense, nutty, barely crumbly, and rich like fudge. But they're also a little chewy, with the papery crust you'd expect from any half-decent brownie or blondie. If you like peanut butter, these are for you.
About Pans
For brownies, blondies, and bars, you want an anodized aluminum pan. If you do not have one, I suggest you buy one. They're sturdy, the results are predictable, and using aluminum will consistently cut your baking time in half when compared to the glass and ceramic alternatives.
Nonstick pans are also a no-go, especially the ones with a dark coating. They tend to be thinner and heat faster than aluminum which leads to over-baking the edges long before the middle of your precious bars have the chance to cook. If you want a soupy middle and tough edges, I'm not going to stand in your way. Chase your bliss.
That said, I'll do my best to give recommendations on how to use those where necessary, but you're much better off buying an aluminum pan like this one. It'll cost you less than the ingredients required to make this recipe twice when your original pan doesn't work out as planned.
Ingredients
- 4 oz Unsalted Butter
- 7 oz Commercial-style Creamy Peanut Butter, like JIF
- 7 oz Chopped White Chocolate, not chips or morsels
- 16 oz Light Brown Sugar
- 3.5 oz White Sugar
- 1.5 oz Malted Milk Powder, like Carnation
- 2 tsp Diamond Crystal Kosher Salt or 1 tsp Table Salt
- 1 tbsp Vanilla Extract
- 5 large Eggs
- 10.5 oz All-Purpose Flour
- 6 oz Peanut Butter Chips, Chunks, Reese's Pieces, Peanuts, Etc.
Directions
- Line an 9"x13" anodized aluminum pan with two perpendicular overlapping sheets of aluminum foil or parchment paper, creating a cross-shaped sling that will help you remove the bars once they're done. Grease lightly with cooking spray.
- Preheat oven to 350ºF, with rack in the middle position.
- Melt the butter, white chocolate, and peanut butter in the microwave in 30 second intervals, stirring in-between to make sure nothing burns. Once everything is fluid, set aside.
- In the bowl of a stand mixer fitted with the whisk attachment, add the eggs, brown sugar, white sugar, malted milk powder, salt, and vanilla. Whip on medium-high until very fluffy and light. This will take about 8 minutes.
- Reduce the mixer speed to low, and add the melted butter, white chocolate, and peanut butter. Continue mixing until mostly combined, then add the flour. Continue mixing at low speed until the flour has been mostly incorporated, then turn off the mixer, remove the bowl, and scrape the batter from the whisk into the bowl with a flexible spatula. Add the chips, chunks, morsels, etc.
- Finish mixing by hand with the flexible spatula, scraping the bowl all the way to the bottom. Make sure no unblended batter remains, but once everything is evenly combined stop stirring.
- Scrape the batter into your prepared pan and bake at 350ºF until golden at the edges, glossy on top with a shiny papery crust, and just barely firm to the touch and 200ºF in the middle. In an aluminum pan at 350ºF this should take 35-40 minutes. In a nonstick pan*, your edges will cook faster than the middle, so start checking around 25 minutes. If it looks like the edges are cooking too quickly, you can turn the temperature down to 325ºF but nonstick pans are variable so I can't promise that'll save your bake.* If using a glass pan the process can take twice as long, so start checking around 45 minutes and be ready to wait considerably longer depending on the thickness of your glass pan.
- Remove from the oven and let cool completely in the pan.
- Once cool, use the sling to remove the bars to a cutting board and portion as desired. Peanut Butter Bars will keep, covered at room temperature for one week. They'll keep indefinitely in an airtight container in the freezer.
