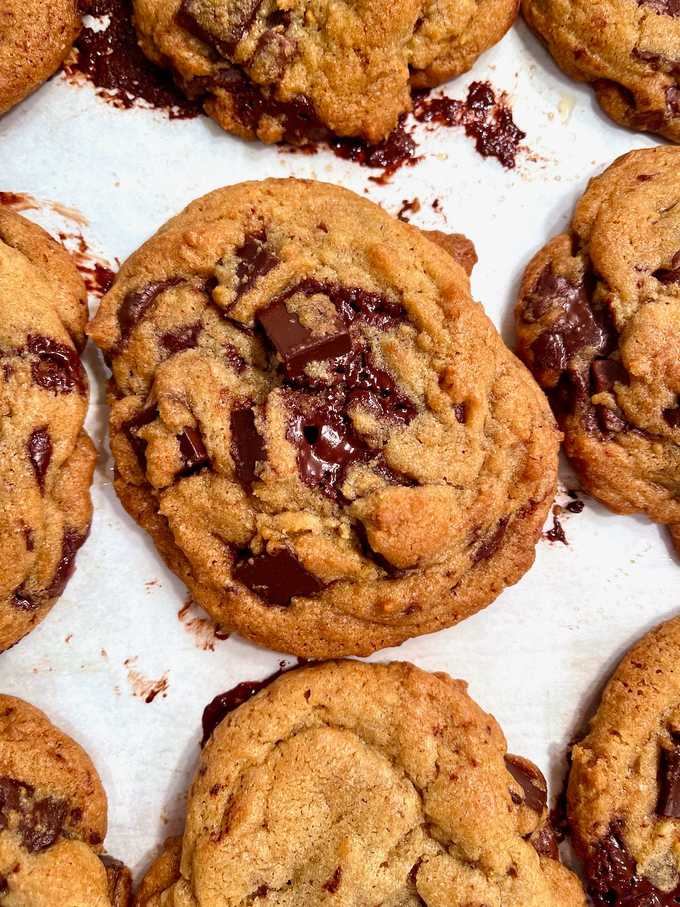
Basic Chocolate Chip Cookies
I feel like every baker has to go on a Chocolate Chip Cookie journey at some point. The CCC is a sweet with variables, with levers. Some things have a “right,” way to be. Macarons have a rubric. Croissants have a rubric. Tarts, pies, florentines, pita, baguettes, they all have an ideal outcome. Chocolate Chip Cookies can be chewy, crispy, doughy, gooey, rich, salty, quick, laborious, toasty, small, or nearly half a pound. All Chocolate Chip Cookies are valid, and loved. There will be more recipes for these flexible treats here, but this is my basic Chocolate Chip Cookie recipe. You can make it in about thirty minutes. It's crispy around the edges, chewy in the middle, and really easy to customize to whatever kind of CCC you want.
Notes
This recipe can be adapted to use whatever sort of chip you like, though I recommend using chopped chocolate bars here since their melty quality will really elevate the end product.
If you do choose to replace the chocolate bars, so long as your final mix-in quantity is around 16-22 oz everything should turn out okay. Feel free to use whatever chips, chunks, or bits you like - chocolate, nuts, candy bars, potato chips, cheeze-its, oreos, sprinkles, or whatever else strikes your fancy. Some mix-ins work better than others in cookies, but experimenting is part of the fun! Ever wondered what a chocolate chip cookie would taste like with black pepper? Start here, add some pepper, and in short order you'll have your answer.
This recipe can also be halved for that sort of experimentation if you don't want to commit to a whole large batch of potentially ghastly experimental cookies.
I marked any steps where you can influence the outcome in the direction of your preferred texture or flavor, so read each step completely before you bake.
Ingredients
- 8 oz Unsalted Butter (2 sticks or 16 tbsp)
- 8 oz Light Brown Sugar
- 4 oz Granulated White Sugar
- 2 Large Eggs
- 13.5 oz All-Purpose Flour
- 1 tsp Baking Soda
- 1/2 tsp Baking Powder
- 1 tbsp Diamond Crystal Kosher Salt or 1 1/2 tsp Table Salt
- 1 tbsp Cornstarch (optional)
- 2 tbsp Dry Milk Powder or Toasted Dry Milk Powder (optional)
- 14 oz Dark Chocolate Bars (around 60-68%) roughly chopped
- 6 oz Milk Chocolate Bars (around 45-55%) roughly chopped
- 1 tbsp Vanilla Extract
Directions
- In a medium bowl, whisk together the all-purpose flour, baking soda, baking powder, salt, and the cornstarch and milk powder if using. The milk powder adds an extra dose of caramel flavor to the finished cookie as the milk sugars caramelize in the oven. The cornstarch helps to keep the cookie soft on the inside and crisper on the outside. Both are optional, but recommended. Set aside.
- Preheat oven to 375ºF and line baking sheets with parchment paper.
- For a more balanced cookie: Make sure the butter is 60-62ºF. In the bowl of a stand mixer fitted with the paddle attachment, add the butter, brown sugar, and white sugar and mix on low speed until moistened. Turn the speed up to medium-high and cream for three minutes. Stop the mixer to thoroughly scrape down the bowl and paddle. Then continue creaming until very pale and fluffy, about two more minutes and move on to step 4. For denser chewier cookies: Melt the butter. In the bowl of a stand mixer fitted with the paddle attachment, add the butter, brown sugar, and white sugar and mix on low speed until moistened. Turn the mixer up to medium-high speed for about 1 minute, scrape down the bowl and paddle, and cream for another 30 seconds before moving on to step 4.
- With the mixer on medium speed, add the eggs and the vanilla extract and mix until combined. Like in step 3, more mixing will yield a more balanced cookie, and less mixing will yield a denser one. Once the eggs have emulsified with the butter and sugar, you can stop. For taller, crisper cookies let the mixer go another 20-30 seconds.
- Add the flour blend to the mixer and mix on low until just a few streaks of unincorporated flour are still visible, then turn off the mixer and add all of your chocolate. Using a flexible spatula, fold the chocolate into the dough by hand until it is evenly distributed making sure to scrape your spatula all the way to the bottom of the bowl so that no dry flour remains. Once the chocolate is distributed and you don't see any pockets of flour, you're done. Continuing to mix will make the cookies tougher, so be aware.
- You can either bake the cookies now, or let the dough rest in the refrigerator for 6-48 hours. Rested dough makes a richer cookie. If you choose to rest the dough, just remove it from the fridge and allow it to return to room temperature before portioning.
- When ready to bake, scoop out 2 oz portions of dough and place on a parchment lined baking sheet, leaving 2 inches between each cookie. Bake on the middle rack for 13-18 minutes, depending on how done you like your cookies. For the most gooey middles, take the cookies out as soon as the outer edge has turned golden but the middles are still puffy. For a downright crunchy cookie wait until the top is golden to pull them out. For even denser cookies, you can bang the pan on your counter to collapse the cookies before their crumb is set.
- Let cool on the pan for at least 10 minutes before moving to a cooling rack.
